Tất cả bài viết | Bootstrap
Hướng dẫn tạo Lightbox bằng Bootstrap
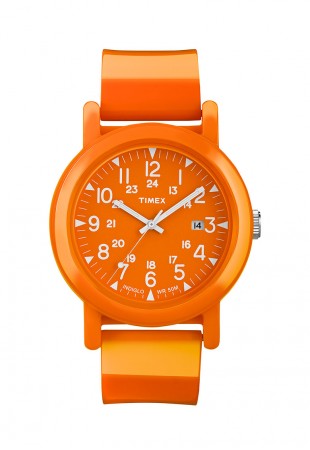
Trong bài thực hành học thiết kế web này các Bạn sẽ được Hướng dẫn tạo Lightbox bằng Bootstrap
Bước 1: Tạo cấu trúc HTML chèn các sản phẩm & tạo Modal Box
1 2 3 4 5 6 7 8 9 10 11 12 13 14 15 16 17 18 19 20 | < h2 align = "center" >Hướng dẫn tạo Lightbox bằng Bootstrap</ h2 > < div class = "container" > < div class = "col-xs-6 col-sm-3" > < a href = "http://hocwebgiare.com/#" class = "thumbnail" data-toggle = "modal" data-target = "#lightbox" > < img src = "http://hocwebgiare.com/thiet_ke_web_chuan_demo/lightbox/images/174.jpg" alt = "Sản phẩm 1" > </ a > </ div > < div class = "col-xs-6 col-sm-3" > < a href = "http://hocwebgiare.com/#" class = "thumbnail" data-toggle = "modal" data-target = "#lightbox" > < img src = "http://hocwebgiare.com/thiet_ke_web_chuan_demo/lightbox/images/140.jpg" alt = "Sản phẩm 2" > </ a > </ div > < div class = "col-xs-6 col-sm-3" > < a href = "http://hocwebgiare.com/#" class = "thumbnail" data-toggle = "modal" data-target = "#lightbox" > < img src = "http://hocwebgiare.com/thiet_ke_web_chuan_demo/lightbox/images/168.jpg" alt = "Sản phẩm 3" > </ a > </ div > < div class = "col-xs-6 col-sm-3" > < a href = "http://hocwebgiare.com/#" class = "thumbnail" data-toggle = "modal" data-target = "#lightbox" > < img src = "http://hocwebgiare.com/thiet_ke_web_chuan_demo/lightbox/images/178.jpg" alt = "Sản phẩm 4" > </ a > </ div > </ div > < div id = "lightbox" class = "modal fade" tabindex = "-1" role = "dialog" aria-labelledby = "myLargeModalLabel" aria-hidden = "true" > < div class = "modal-dialog" > < button type = "button" class = "close hidden" data-dismiss = "modal" aria-hidden = "true" >×</ button > < div class = "modal-content" > </ div > </ div > </ div > </ div > |
Bước 2: Định dạng CSS
1 2 3 4 5 6 7 8 9 10 11 12 13 14 15 16 17 18 19 20 21 22 23 | < style type = "text/css" >body { padding: 0px 0px; } #lightbox .modal-content { display: inline-block; text-align: center; } #lightbox .close { opacity: 1; color: rgb(255, 255, 255); background-color: rgb(25, 25, 25); border-radius: 25px; border: 2px solid rgb(255, 255, 255); position: absolute; top: -15px; right: -55px; z-index:1032; padding-top: 0px; padding-right: 8px; padding-bottom: 4px; padding-left: 8px; }</ style > |
Bước 3: Gọi thư viện Bootstrap
1 | < link rel = "stylesheet" href = "https://maxcdn.bootstrapcdn.com/bootstrap/3.3.5/css/bootstrap.min.css" > <script src="https://maxcdn.bootstrapcdn.com/bootstrap/3.3.5/js/bootstrap.min.js"> </script> |
Bước 4: Gọi thư viện JQUERY
1 | <script src="js/jquery-1.11.1.min.js"> </script> |
Bước 5: Tạo lightbox bằng JQUERY
1 2 3 4 5 6 7 8 9 10 11 12 13 14 15 16 17 18 19 20 21 22 23 | <script type="text/javascript"> $(document).ready( function () { var $lightbox = $( '#lightbox' ); $( '[data-target="#lightbox"]' ).on( 'click' , function (event) { var $img = $( this ).find( 'img' ), src = $img.attr( 'src' ), alt = $img.attr( 'alt' ), css = { 'maxWidth' : $(window).width() - 100, 'maxHeight' : $(window).height() - 100 }; $lightbox.find( '.close' ).addClass( 'hidden' ); $lightbox.find( 'img' ).attr( 'src' , src); $lightbox.find( 'img' ).attr( 'alt' , alt); $lightbox.find( 'img' ).css(css); }); $lightbox.on( 'shown.bs.modal' , function (e) { var $img = $lightbox.find( 'img' ); $lightbox.find( '.modal-dialog' ).css({ 'width' : $img.width()}); $lightbox.find( '.close' ).removeClass( 'hidden' ); }); }); </script> |
Bootstrap Xem (4019) Học thiết kế web giá rẻ